
Recent Post

Elastic Tension Rehab Protocols: Shoulder Recovery Guide

Fast-Absorbing Whey Isolate Digestion: A detailed guide to understanding protein digestion

Ergonomic Neoprene Strength Trio: 2026 Selection Guide

Versatile Resistance Band Training: How-To Guide

Certified Gluten Free Whey Isolate: 2026 Buying Guide

Ultra-Portable Grip Technology: 2026 Travel Yoga Mats
Leave a comment
Elastic Tension Rehab Protocols: Shoulder Recovery Guide
Ever found yourself wincing every time you reach for a coffee mug after a rotator cuff strain? That nagging pain is the kind of thing that makes you question whether you'll ever get back to your favorite overhead press again.
The good news is you don’t need a bulky gym or a pricey physiotherapist to start healing. A simple resistance band can become your most reliable rehab partner, offering just enough tension to mobilize the shoulder without overloading it.
Think about it this way: bands are like elastic friends – they stretch, they give back, and they let you control the range of motion minute by minute. Because the resistance is constant, you can perform slow, controlled reps that target the supraspinatus, infraspinatus, and deltoid safely.
Let’s walk through a real‑world scenario. Sarah, a 32‑year‑old recreational swimmer, injured her shoulder during a butterfly drill. She swapped her dumbbells for a light yellow band (≈10 lb resistance) and began with the “Pendulum Pull” – standing with a slight bend, she let the arm dangle and gently pulled the band forward, creating a tiny arc. After two weeks she progressed to “Band External Rotation” at a seated table, keeping her elbow tucked at 90°, rotating the forearm outward. Within a month Sarah reported a 70 % reduction in pain and could resume light laps.
If you’re wondering how to choose the right band, start low and graduate upward. Most kits come in a color‑coded set – green for beginners, red for moderate, blue for advanced. A practical tip: loop the band around a sturdy door anchor, hold the handle, and perform 2‑3 sets of 12‑15 slow reps, resting 30 seconds between sets. Consistency beats intensity, so aim for three sessions per week.
Don’t forget to pair the exercises with proper posture cues. Keep your scapula retracted, chest up, and avoid shrugging the shoulder up toward the ear. If you feel any sharp pain, stop immediately – a mild stretch should feel like a gentle pull, not a stabbing sensation.
And because you’ll eventually need a bit more challenge, consider adding a stronger band from our Strength Training Essentials collection. Those bands can double the load while still being portable enough for a home setup or a travel bag.
Bottom line: resistance band exercises give you a low‑cost, low‑impact way to rebuild shoulder stability, improve range of motion, and get you back to the activities you love. Grab a band, follow the progressive steps, and listen to your body – you’ll be surprised how quickly the shoulder starts to feel like yours again.
TL;DR
Resistance band exercises for shoulder rehab let you rebuild stability, regain range of motion, and return to daily activities without expensive equipment or gym time.
Start with a light band, perform slow controlled reps three times weekly, progress gradually, and listen to your body – you’ll notice significant improvement within weeks.
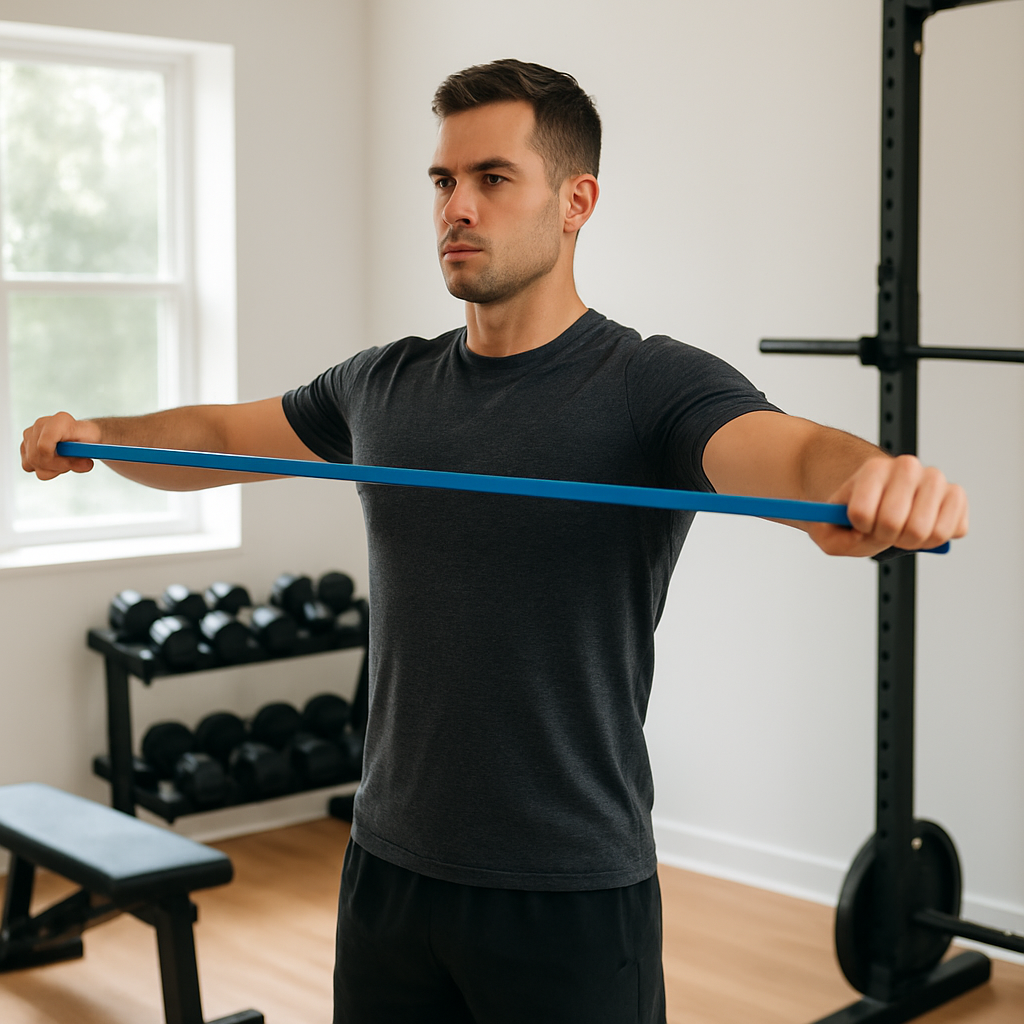
1. Band Pull‑Apart for Rotator Cuff Activation
Ever feel like your shoulder just won’t cooperate after a strain? The band pull‑apart is the low‑tech hero that gently re‑engages the rotator cuff without turning your living room into a weight‑room.
All you need is a light resistance band (yellow or green works for most beginners) and a clear space where you can stand tall. Think of the band as a stretchy handshake between your hands – it pulls, it releases, and it teaches your muscles to fire in sync.
Here’s the quick‑step listicle that will get you moving in under a minute:
- Grab the band with both hands shoulder‑width apart, palms facing down. Your elbows stay soft, not locked.
- Engage your scapula by pulling your shoulder blades together. This tiny cue protects the joint and forces the rotator cuff to do the work.
- Pull the band outward until your arms form a straight line in front of you. Aim for a controlled, smooth motion – no jerks.
- Hold for a beat (1‑2 seconds) and feel the stretch across the back of your shoulders.
- Return slowly to the start position, resisting the band’s pull.
That’s it. Start with 2 sets of 12‑15 reps, three times a week. As the exercise feels easier, you can step your feet wider or switch to a slightly thicker band for extra challenge.
Need a visual reference? This short video walks you through the exact form, breathing cues, and common mistakes to avoid.
Notice how the presenter emphasizes a slight pause at the end of each rep? That pause is the sweet spot where the rotator cuff fibers fire most efficiently.
If you’re curious about the science behind the movement, AthleMove’s guide to band pull‑apart technique breaks down the muscle activation patterns in plain English – perfect for anyone who likes a bit of nerd‑y detail.
Now, a quick workplace tip: many small businesses are adding shoulder‑health modules to their wellness programs. Pairing the pull‑apart with a step‑by‑step guide for offering health insurance to employees can turn a simple exercise into a company‑wide injury‑prevention initiative.
Tracking progress can be surprisingly motivating. I’ve started logging my reps in MarisGraph’s visual tracking tool, which turns raw numbers into colorful charts you can glance at while sipping coffee.
Here are a few extra pro tips to keep the gains coming:
- Keep your core braced – a solid core protects the spine and lets the shoulders work harder.
- Don’t over‑stretch. If the band snaps back too quickly, you’re likely using too much tension.
- Combine the pull‑apart with a light shoulder external rotation set to hit the posterior rotator cuff fibers.
Remember, consistency beats intensity. Even a 5‑minute session each workout day adds up, and you’ll notice less pain and more confidence reaching for that coffee mug.
2. External Rotation with a Loop Band
Why external rotation matters
When your rotator cuff is on the mend, the tiny muscles that pull your arm outward often get the short end of the stick.
That’s why we love a good external rotation move – it nudges those under‑used fibers back into shape without putting the shoulder joint under heavy load.
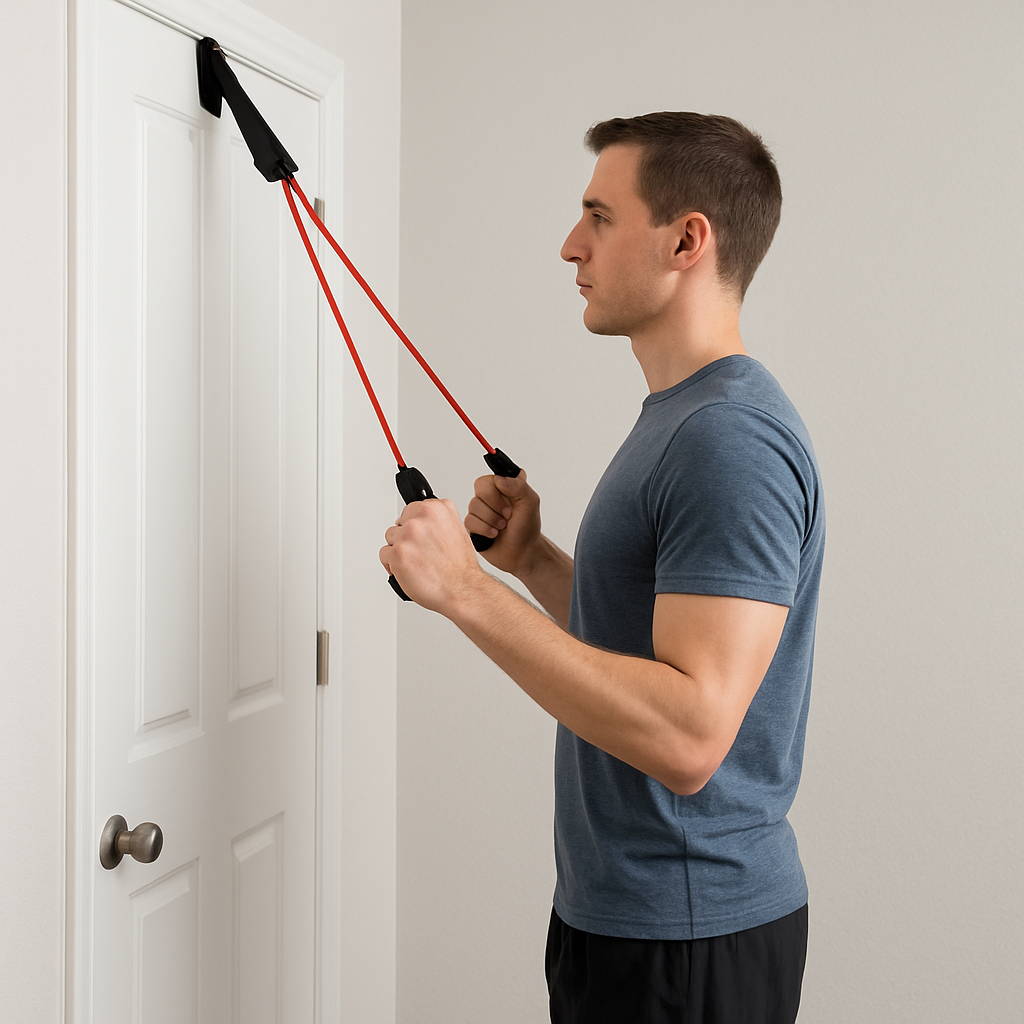
Grab a loop band and get comfortable
First things first: find a loop band that feels snug but still lets you stretch a little. Too loose and you’ll waste time; too tight and you’ll risk a flare‑up.
Stand tall, feet hip‑width apart, and anchor the band around a sturdy door knob or a piece of furniture at about waist height.
Does the idea of “finding a good anchor” sound tricky? It’s really just a matter of making sure the point won’t wobble when you pull.
Step‑by‑step execution
1️⃣ Set your posture. Chest up, shoulders down, core engaged – think “standing proud, not slouching.”
2️⃣ Position your elbow. Bend it to 90°, keep the upper arm close to your side, and let the forearm point straight ahead.
3️⃣ Pull the band. Gently rotate the forearm outward, aiming to keep the elbow glued to your torso. Move slowly – about two seconds out, two seconds back.
4️⃣ Breathe. Exhale as you pull, inhale as you return. It sounds simple, but that rhythm helps your muscles stay coordinated.
Give yourself a few reps, pause, then repeat. It’s the classic “slow and steady wins the race” mantra.
Common mistakes to dodge
Ever caught yourself shrugging the shoulders up toward the ears? That’s a red flag – it shifts the load away from the rotator cuff and onto the traps.
Another sneaky culprit is using momentum. If the band snaps back too fast, you’re turning a rehab move into a power lift, which can irritate healing tissue.
So, keep the motion controlled, keep the shoulders relaxed, and you’ll stay in the safe zone.
Progression tips
When the last rep feels easy, don’t crank up the band to the next color just yet. Instead, try:
- Adding a half‑second pause at the end‑range.
- Increasing the number of sets from two to three.
- Shortening the distance between your hands on the loop to raise the tension.
These tiny tweaks keep the stimulus challenging without shocking the joint.
Safety checklist
Before you start, ask yourself: Does anything hurt sharp rather than a gentle stretch? If yes, stop and reassess.
Make sure the band isn’t frayed – a snapped band can yank your arm unexpectedly.
And remember, the goal is quality over quantity. A few well‑executed reps trumps a marathon of sloppy ones.
According to a rehabilitation protocol for reverse shoulder arthroplasty, external rotation with a resistance band is a staple early‑phase exercise to restore cuff balance while protecting the joint.
Ready to give it a go? Set up that loop band, follow the steps, and watch the shoulder’s outer rotators come alive. Consistency is key – aim for two to three sessions a week, and you’ll start feeling the difference in daily tasks like reaching for a coffee mug or opening a cupboard door.
3. Shoulder Flexion Press‑Out (Video Demonstration)
Ever wonder why your arm feels tight when you try to lift it straight in front of you? That’s the shoulder flexion plane screaming for a little mobility work, and the press‑out with a resistance band is one of the easiest ways to give it relief.
Let’s break it down into bite‑size steps you can actually follow while watching a quick demo video. Grab a light to medium loop band – something that gives you a gentle stretch but doesn’t yank your arm back.
1️⃣ Set up your anchor and posture
- Find a sturdy door frame or a piece of furniture at about waist height.
- Loop the band around the anchor and step back until there’s a slight tension.
- Stand tall, feet hip‑wide, shoulders relaxed, chest lifted. Imagine you’re trying to keep your ears from touching your shoulders.
Why does posture matter? A stable base lets the shoulder move only where you want it to, keeping the rotator cuff safe.
2️⃣ The press‑out movement
- Start with your arm bent at 90°, elbow tucked close to your side, forearm pointing forward.
- Take a slow breath in, then exhale as you push the band straight out in front of you, extending the arm to about 120°.
- Pause for a count of two when your hand is fully extended.
- Inhale as you guide the band back to the start position, resisting the pull for 2–3 seconds.
Notice the rhythm: 2‑second push, 2‑second hold, 2‑second return. That tempo forces the tiny stabilizers to fire, not just the big deltoid.
Does it feel odd at first? That’s normal. Your muscles are learning a new pattern, and the band gives just enough feedback to keep you honest.
3️⃣ Common pitfalls and how to fix them
- Shoulder shrugging – if your shoulders creep up, you’re recruiting traps instead of the flexors. Pull them down gently before each rep.
- Elbow drifting away – keep the elbow glued to your side; a small towel rolled under the arm can remind you.
- Rushing the tempo – speed turns the move into a swing. Reset your watch or phone timer and count out loud.
And remember, pain that feels sharp is a red flag. Stop, check the band for wear, and maybe drop the resistance a notch.
4️⃣ Progression ideas without swapping bands
- Add a half‑second “isometric squeeze” at the end‑range before you pull back.
- Increase sets from two to three, keeping reps in the 10‑12 range.
- Shorten the distance between your hands on the loop to raise the tension subtly.
- Try a unilateral version: press‑out one arm while the other rests, then switch.
These tweaks keep the challenge alive without the risk of jumping to a heavier band too soon.
5️⃣ Quick checklist before you hit play
- Band is intact, no frays.
- Anchor is secure and won’t wobble.
- Posture: chest up, shoulders down, core engaged.
- Tempo: 2‑2‑2 seconds.
- Stop if any sharp pain appears.
Give yourself a minute to set up, then hit the play button on the video and follow along. You’ll feel a subtle opening in the front of the shoulder, and after a few sessions the motion will start to feel smoother in everyday tasks – like reaching for a high shelf or tossing a ball overhead.
So, what’s the next step? Grab that loop band, set up the anchor, and run through the press‑out three times today. Consistency beats intensity, and soon you’ll notice the difference in how freely your arm moves.
4. Scapular Retraction with a Band (Comparison Table)
Okay, you’ve nailed the pull‑apart and the external rotation – now it’s time to give those shoulder blades a proper squeeze. Scapular retraction with a band is the secret sauce that keeps the shoulder joint stable while you’re rebuilding strength.
Ever notice how, after a long day at the desk, your shoulders feel rounded and tight? That’s a classic case of a lazy scapula, and it’s exactly what this move fixes.
Why the retraction matters
When you pull your shoulder blades together, you’re training the middle trapezius, rhomboids, and the lower traps to fire on cue. Those muscles act like the scaffolding behind every overhead press, pull‑up, or even reaching for a grocery bag.
Think of it as setting a solid foundation before you build the house – without it, everything wobbles.
How to perform the band scapular retraction
1️⃣ Grab a light‑to‑medium loop band (green or red in most kits).
2️⃣ Anchor it at chest height – a sturdy door frame works great.
3️⃣ Stand tall, feet hip‑wide, shoulders relaxed, core engaged.
4️⃣ Extend your arms straight in front, palms facing down, slight bend in the elbows.
5️⃣ Pull the band by squeezing your shoulder blades together, keeping the elbows soft. Aim for a 2‑second pull, 2‑second hold, 2‑second return.
That rhythm forces the tiny stabilizers to do the work instead of letting the big deltoids take over.
Tips to keep the move effective
• Keep your neck neutral – no craning forward.
• Imagine trying to pinch a pencil between your shoulder blades.
• If the band feels too easy, shorten the distance between your hands or step a bit farther from the anchor.
• Breathe out on the pull, inhale on the release; the breath anchors your core.
Does it feel weird at first? That’s your body learning a new pattern, and that slight “odd” sensation is exactly the cue that the muscles are engaging.
Common pitfalls (and how to dodge them)
• Shrugging up – the traps will take over and you lose the retraction benefit. Drop the shoulders before each rep.
• Over‑extending the elbows – lock them and you turn the exercise into a chest fly. Keep a soft bend.
• Rushing the tempo – speed turns this into a momentum game, reducing the quality of the squeeze.
Fix those and you’ll feel a tighter, more controlled shoulder blade pack after just a few sets.
When to progress
When the last rep feels easy, try one of these without swapping bands:
- Hold the squeeze for an extra second before releasing.
- Increase from two to three sets while staying in the 12‑15 rep range.
- Step back a half‑step to increase tension subtly.
Those tiny tweaks keep the stimulus fresh and prevent plateau.
Quick decision‑making table
| Feature | Band Choice | Key Cue / Note |
|---|---|---|
| Beginner stability | Light green band (≈5‑10 lb) | Focus on full scapular squeeze, 2‑2‑2 tempo. |
| Intermediate strength | Red band (≈15‑20 lb) | Shorten hand spacing or step back to raise tension. |
| Advanced control | Blue band (≈25‑30 lb) | Add 1‑second hold at peak retraction, keep elbows soft. |
Pick the row that matches where you are today, and you’ll have a clear path forward.
So, what’s the next move? Grab that loop band, set the anchor, and run through three sets of 12‑15 scapular retractions right now. Consistency beats intensity, and you’ll notice your shoulders feel more anchored in everyday tasks – like pulling a drawer open or stabilizing during a push‑up.
5. Overhead Band Pull‑Down for Deltoid Strength
Ever feel like your shoulders just don’t answer when you reach up for the top shelf? That hollow feeling is often a timid deltoid that’s scared to fire because it’s been under‑used during rehab. The overhead band pull‑down is a gentle way to coax that front‑deltoid back into action without loading the joint.
Think of the band as a supportive friend – it gives just enough resistance to make the muscle work, but it never jerks you around. That’s why Healthline notes that resistance band exercises are effective and simple, especially for shoulder rehab. Let’s break down how to turn this simple idea into a reliable strength builder.
Why the overhead pull‑down matters
The deltoid is the workhorse for any overhead motion, from lifting a grocery bag to throwing a ball. When it’s weak, the rotator cuff and upper back end up compensating, which can lead to new aches. Adding a focused pull‑down teaches the deltoid to take the lead again, improving posture and shoulder stability.
Equipment you’ll need
- Loop band (light‑to‑medium tension; green or red in most kits).
- Sturdy anchor at about chest height – a door frame, a heavy piece of furniture, or a dedicated wall mount.
- Comfortable shoes and a space where you can stand tall.
All of these items fit nicely into the portable gear you’d find at FitCore Supply, making it easy to set up in a living‑room or a hotel room.
Step‑by‑step execution (listicle style)
- Set your base. Stand feet hip‑width apart, grip the band with palms facing down, and step back until you feel tension with arms fully extended overhead.
- Engage the core. Imagine you’re about to sneeze – tighten your abs and keep a neutral spine. This prevents you from using momentum.
- Pull down deliberately. Drive your elbows down and slightly back, tracing a slight arc as the band resists. Aim for a 2‑second descent.
- Pause at the bottom. Hold the elbows just below shoulder level for a count of two. Feel the front‑deltoid contract.
- Return slowly. Let the band guide your arms back up over 2‑3 seconds, maintaining tension the whole way.
Repeat for 8–12 reps, then rest 30 seconds. Do 2–3 sets. If the last rep feels easy, step a half‑step farther from the anchor or tighten your grip to increase tension.
Common pitfalls and how to dodge them
We’ve all done the “rock‑the‑band” move, where you swing the elbows forward to cheat the resistance. That turns the exercise into a momentum game and strips the deltoid of the work it needs. Keep the motion controlled; if you’re tempted to swing, shorten the range or use a lighter band.
Another trap is shrugging the shoulders up toward the ears. This recruits the traps instead of the deltoid. Before each rep, pull the shoulders down and think, “I’m not letting my ears win.”
Progression ideas without buying a new band
- Add a half‑second isometric hold at the bottom of each rep.
- Increase total sets from three to four while staying in the 8‑12 rep window.
- Perform the pull‑down one arm at a time, using the opposite hand to stabilize the band on the anchor.
These tweaks keep the stimulus fresh and let you keep the same band for weeks.
Real‑world snapshot
Jenna, a 28‑year‑old yoga instructor, noticed her shoulders sagging after a month of back‑to‑back class teaching. She added the overhead band pull‑down to her routine three times a week. Within two weeks she reported that reaching for a high shelf felt “lighter,” and her shoulder blades stayed flat during sun‑salutations.
That’s the kind of everyday win we’re aiming for – not a gym‑hero moment, but a subtle boost that makes daily life feel smoother.
And remember, consistency beats intensity. A few mindful reps three times a week will do more for deltoid strength than a single all‑out session.
So, what’s the next move? Grab that loop band, set the anchor at chest height, and run through three sets of eight to twelve overhead pull‑downs right now. You’ll feel the front deltoid engage, and soon those everyday lifts will stop feeling like a chore.
Conclusion
So, after walking through band pull‑aparts, external rotations, press‑outs, scapular retractions, and the overhead pull‑down, you’ve seen how a handful of resistance band exercises for shoulder rehab can turn a stiff, painful joint into a smooth, functional mover.
Remember, the magic isn’t in crushing heavy weights; it’s in consistency, controlled tempo, and listening to that subtle “good‑pain” signal. A few mindful reps three times a week keep the rotator cuff humming and the deltoid confident.
Key takeaways
- Start low, progress gradually – the band’s colour tells you when you’re ready.
- Focus on form: shoulders down, core tight, tempo 2‑2‑2 (or 2‑2‑3 for pull‑downs).
- Mix the moves every 2‑3 weeks to avoid plateaus and keep the muscles guessing.
- Stop any sharp pain instantly; a mild stretch is all you should feel.
And here’s a little extra: set a simple checklist before each session – band intact, anchor secure, posture checked – and you’ll walk away feeling stronger every time.
Does that sound doable? Great. Grab a loop band from your FitCore stash, pick a spot, and give yourself three sets of your favorite combo today. Your shoulder will thank you, and you’ll be one step closer to tackling daily lifts without a second‑guess.
Stick with the plan, trust the process, and watch the recovery unfold – because you’ve got the tools, the know‑how, and the confidence to make it happen.
FAQ
What are the best resistance band exercises for shoulder rehab?
The sweet spot is a mix of pulls, rotations, and presses that hit every rotator‑cuff fiber without overloading the joint. Start with a band pull‑apart for scapular stability, follow with external rotation using a loop band, add a shoulder‑flexion press‑out, then finish with an overhead pull‑down for deltoid strength. Stick to 2‑3 sets of 12‑15 reps, keep the tempo slow (2‑2‑2), and you’ll feel the joint waking up in a week or two.
How often should I train with bands to see progress?
Most people find three sessions a week is the sweet spot – enough frequency to build neuromuscular memory but enough rest for the tiny cuff muscles to recover. Aim for Monday, Wednesday, Friday or any three‑day pattern that fits your schedule. If you’re sore, drop to two days and focus on perfect form; once the pain fades, you can add a fourth light day for extra volume.
What resistance level should I start with?
If you’re just back from a strain, start with the lightest green or yellow band – roughly 5‑10 lb of tension. You should be able to move through the full range without sharp pain, and the final two reps ought to feel challenging but still controllable. When those reps become easy, move up one colour. A handy trick is to choose a band that lets you pull back about a quarter of the way to full extension on the first set.
Can I combine resistance band rehab with other workouts?
Absolutely – bands are perfect side‑kicks for strength, cardio, or yoga days. On a heavy‑lifting day, finish your session with a quick band circuit for the rotators; it won’t tire you out but will reinforce joint stability. On cardio or yoga sessions, use the band as a warm‑up or active‑recovery tool, looping it around a door or a pole for gentle shoulder mobility. Just keep the intensity low and the focus on form, and you’ll avoid overworking the healing tissue.
What signs tell me to stop the exercise?
Listen to your body – a mild stretch or a low‑grade ache is normal, but any sharp, stabbing sensation means you’ve crossed the line. If you feel a sudden pop, tingling down the arm, or your shoulder starts to lock up, drop the band immediately and reassess your form. It’s also wise to stop if the band shows fraying or if you notice compensatory movements like shoulder shrugging or excessive arching of the lower back.
How long before I notice real improvement?
Most beginners report feeling a lighter range of motion and less nagging pain after two to three weeks of consistent band work, provided they’re sticking to the 2‑2‑2 tempo and respecting rest days. Full functional recovery – like lifting a grocery bag overhead without wincing – usually takes six to eight weeks, but that varies with age, injury severity, and how diligent you are with the daily checklist.